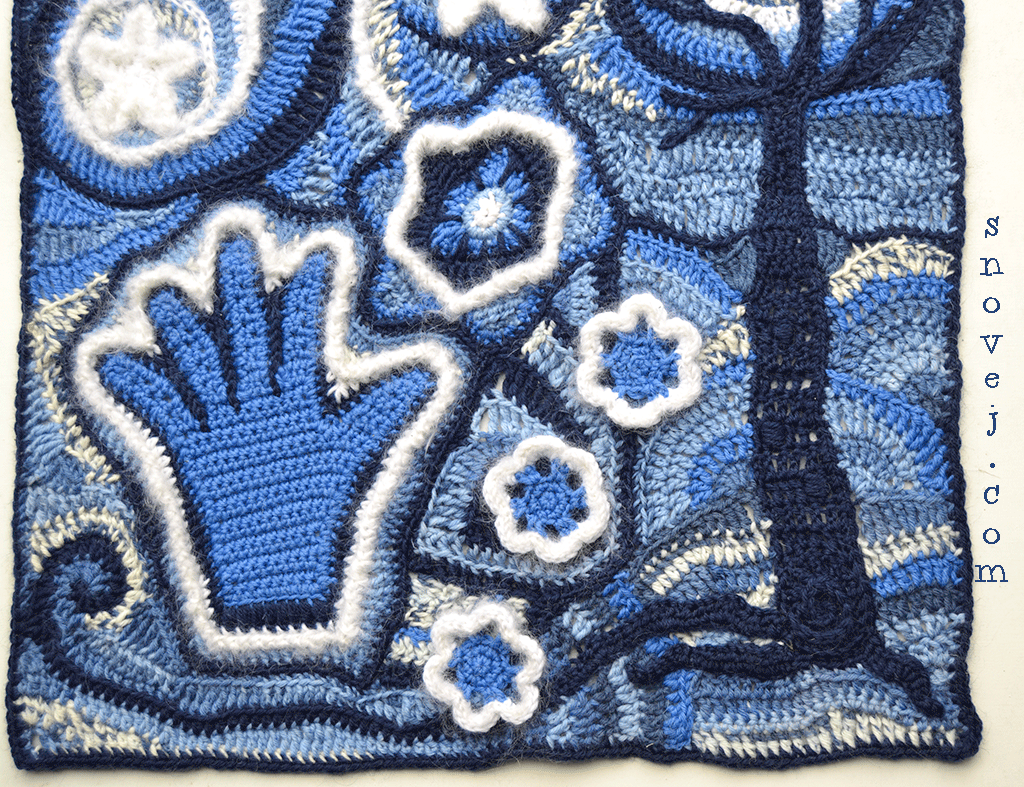
My Dada Neon CAL project is finally almost done! It took me much longer than I had thought due to a very busy summer working for our condiment business.
I wrote about joining this CAL in Freeform CAL by Dada Neon. In the post, the project had only two scrumbles done, and it ended with a question about yarn choices.
After days of head scratching, I chose not to use any other yarns than the ones I first picked for this project. I also chose to continue with normal crochet stitches. No fancy novelty stitches at all.
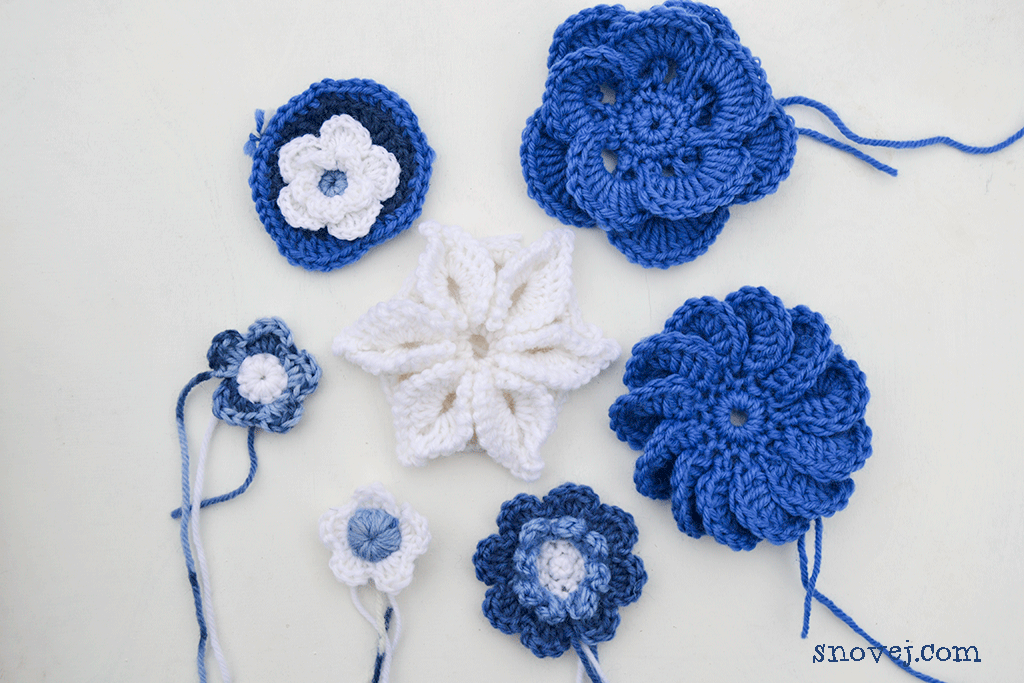
The Week 3 “flowers on grass” scrumble almost gave me a headache. I tried out several styles for the flowers as seen in the photo below:
But, they seemed too big, or too elaborate. As I was reading my daughter’s blog, I remembered the cute simple flower pattern she had once posted. I looked it up, and it was perfect!
The pattern for her cute two-tone flower is here.
I used the sky blue and the white wool yarns. I added one more round of slip stitches with the fluffy mohair yarn.
For the grass I finally decided to just make arches, and to use arches all through the project for the background/spaces between the scrumbles.
Next step, Week 4, was to create a scrumble of a starry sky inspired by Vincet van Gogh’s painting. I crocheted the stars, then crocheted around them, making the stitches in the back loops of the star and jumping over the tips which I later sewed down with the blue yarn ends.
Lastly, I made reverse single crochet around the stars, as well as in the white swirls of the sky.
Having the sky attached to the project I realized there wasn’t room for much more. By now I had several “Weeks” to choose from. I chose to make the tree from Week 6, as well as to add a moon to the sky.
Before continuing I made a square template of sturdy paper. I pinned the whole project on it. Now I had an idea of how big the tree would be.

The tree is made as a separate piece, starting with a swirly spiral at the base. The trunk is made with double crochet rows, with a few offset puff stitches. The branches are made with chain stitches and slip stitches and a few half double crochets. I left long tails to use for attaching the branches to the moon.

The branches were then pinned on top of the moon, and the trunk aligned with the side of the template and pinned down.
Next I made arches between the trunk and the scrumbles to the left. Then between the trunk and the right edge of the template.
The arches resulted in a lot, and I mean A LOT, of yarn ends. Some of them I used to close gaps in the crocheted fabric.

It took me days to finish all the tails. I’m not exaggerating! In the photo above, the fabric is turned to show both the front and the back. A jungle of tails on both sides.

I even lost my scissors in it!
Next step was to fill in the empty spaces around the project, to be even with the edges of the template.

I liked the result. But, to balance the picture, I wanted something white by the tree.
I would have wanted to add a black cat. The cat would have represented Week 5 that asked for a scrumble of a favorite pet. In this case my cat would have been a dark blue cat. The picture screamed for white, and I could not make my black cat white …
Then I remembered having “pinned” a pattern for a simple crocheted bunny. I looked it up and made one. In the photo below, it’s the one on the right.

(Sorry about the poor quality of the photo. I took the photos in a haste before leaving Finland, and as I left the pieces there, I can’t take a new photo at this time.)
He turned out to be too big. So I tried to make him smaller. Finally, he turned out cute enough to be included in the project. He’s the one to the left.
I never had a bunny of my own, but years ago my daughter had several. Someday I hope to have white angora bunnies. The conclusion: the bunny represents Week 5!
Here’s how I made the bunny smaller; based on the original pattern:
I used a lighter weight wool yarn than the ones used for the CAL, and a 3 mm hook.
1) 6 SC (Single Crochet) into magic circle, SL ST (Slip Stitch)
2) CH (Chain) 1, 2 SC in each st, SL ST
3) CH 1, *SC in next, 2 SC in next*, repeat *-* around, SL ST
4) CH 1, *SC in next two sts, 2 SC in next*, repeat *-* around, SL ST
5) Head: CH 1, 1 HDC (Half Double Crochet) and 1 DC (Double Crochet) in next st, 2 TR (Treble) in next, 1 DC and 1 HDC in next.
6) CH 1, SL ST around, make last sl st in first dc.
7) Ears: *CH 4, SC in 2nd ch from hook, HDC in next two sts*, SL ST between tr sts, repeat *-* for second ear, SL ST in last dc and next two sts. Cut yarn and use the tail to close the gap between ears and head.
8) Tail: I used the mohair yarn. Make a Bobble St: CH 2, 4 incomplete DC in first ch (five loops on hook), yo, pull through all loops, yo, pull through, cut yarn and fasten the tail to the body.
9) I decide to make one more row of sl sts around the whole bunny, with the mohair yarn.
To make the edge of the pillow more stable I crocheted two rounds of half double crochet all around. One row went into the back loops, the other row into the front loops. This makes a sturdy, doubled up edge for the pillow.

After toying with ideas for a fringe, I decide to make pom poms by crocheting puffs.
As a final touch, I made some dangly thingies in the corners. One corner still awaits its dangles …
In Part 3, I will show you how to make the crocheted pom pom fringe. In Part 4 I’ll show you how to make the pillow case with a zipper, and inner pillow in case your pillow won’t fit any ready-made ones. I’ll make the pillow case from some dark blue, soft wool fabric.
I’ll post links below when I get Part 3 and 4 posted.
This project has been surprisingly fun to do!
The official name for this CAL is “Your Personal Freeform CAL!” Julia at Dada Neon is such a fun sweetheart and her directions for the scrumbles are very much freeform in that she tells you to crochet a shape and make a scrumble of it. She doesn’t tell you how to make the shape. That is totally up to you.
True to its name, the CAL project is very personal as it asks you to crochet your favorite things. Like your favorite dream house, or vacation, or a memory. The sweetest part, Week 10, asks you to crochet a heart for a lost loved one. The Cal participants made awesome heartfelt scrumbles. You can almost see the strong emotions in them!
Read more about it on Julia’s blog, Dada Neon Crochet. In the righthand column, you can find all the “Weeks”. The first one was posted in May and is here. Doing just the first Week is a good way to get started in learning freeform crochet!
You can also find the CAL on Ravelry, as well as on Facebook. The CAL is now in Week 20.
Do join! You’ll have a helluva fun time, as well as finding yourself digging deep into your soul …
~ Marina
Update!
Dada Neon CAL Part 1


Leave a Reply