
Part of our Haunted House tour takes the visitors outside and around the house. Near the backdoor is a spooky cemetery with zombies roaming around …
Most often we make our props and sets from stuff we have around. We collect certain trash and junk that could be useful, and in this case we had saved suitable cardboard boxes, newspapers, and leftover paints. We taped the boxes together to form tombstones of various shapes.
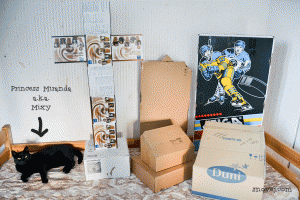
Our old schoolhouse has a small apartment waiting to be renovated some day. In the meantime we use it for fun crafting, and as a home for our Ghost Club.
Of course our black cat wants to hang out there too!
To the left is a collection of assembled boxes ready to be painted.
You need weights!

Before preparing boxes, you need to find weights to put inside them. Mine are plastic bags or containers filled with gravel. They don’t need to weigh a lot, just enough to keep the box from falling over.
Preparing boxes
I collected big flat boxes, the bigger the better. But also square boxes that make good stones with a slanted front, or they can be used as a base for other boxes. Small boxes can be taped together to form a shape, like the cross I made with sturdy ice cream boxes.
To make a tombstone with a slanted top, choose a square box.


About 2/3 from the bottom, make a straight line with a marker. Put a ruler at the end of that line, on the side of the box, and place the other end of the ruler at the back corner. Draw a line. Do the same thing on the other side.
Carefully cut out the triangle shape above the line on both sides of the box. Use a knife rather than scissors.
Place the box with the front side down. Place a ruler against the cut corners on the inside of the box. With a blunt tool, like the tip of unopened scissors, press down a groove as in the picture above.


Turn the box upright, and place a weight in it.
Fold the top pieces together, bending the front piece along the grooved line. Tape it together.
Cut corners!
To create an old, worn look, cut the stones in a few places. Cut off a corner as if it had been broken off. Make long cuts along sides to make them look worn. Use a knife! For me a serrated knife works best. Cut downward, in a sawing motion.


The holes need to be covered up. On larger holes use pieces of cardboard and tape. On one stone I used the cut-off corner as a decorative piece on top of the stone.
I used the paper mache method and glued torn newspaper pieces over the broken parts, and also on the places where the cardboard pieces were overlapping.
First paint layers
The boxes were painted with two coats of acrylic paint. I used white paint with a small amount of black paint, without mixing them, having fun seeing the many shades of grey it created on the stones.
Remember to paint the underside of stones too! This will protect the cardboard from moisture and other damage.
Decor
Before adding the final paint layer, you might want to decide on decorating the stones with pictures or text. It’s easier to glue on pieces on a flat surface and not on the textured one of the sand paint.
An easy way to add perfect letters is to write the words on a computer and print them out. To save on ink, I made my letters in a light grey shade. In the same manner you can add pictures too!


Secure the print onto the stone. Draw the outlines of the letters with a pen, pressing down. Remove the print. The outlines are now engraved into the cardboard. To see them better, trace them with a pencil. Paint the letters. Don’t worry about mistakes outside of the letters, they will be covered by the third paint layer.

For the cross and one of the flat stones I wanted fancier decor. For the cross I found a round plastic cover that fit perfectly in the middle. My niece Madelaine shaped a spooky angle on it. She used store bought putty and mixed it with paint. I glued it on with hot glue.

In the same manner she shaped a weeping angle directly on the stone.

Stone surface
For the final, decorative layer of paint, I placed white and black paint side by side with some sand in a paint tray lined with a plastic bag. I did not mix them. I used an old brush and dipped it in both colors and the sand. This resulted in uneven grey colors, as well as both white and black specks.


I covered a small area at a time with a thick layer of paint. Then I stippled over it with a piece of rolled up foam, at times dipping it slihgtly in either black or white paint to get the result I was looking for. My foam piece is actually a shoulder pad from a cut up old shirt I picked up at a flea market in order to use the fabric!
You can also stipple the paint on with the brush in areas where you want the surface to be coarser. In this picture you see well the different shades from white to black, as well as the grainy texture of the sand. The dried paint will flatten out some, but still be textured due to the sand.
The wet outdoors
Protect your stones with a coat of matte finish suitable for the outdoors. Place the stones on a sheet of plastic or a tarp. On an uneven surface you’ll need to secure the stones with sticks pushed into the ground. You can also use natural stones to keep the tombstones in place.
Gather leaves to form a long pile in front of each stone. Also cover any visible plastic or tarp with the leaves. Add more decor to your graveyard, like lights, Jack-O-Lanterns, maybe zombies crawling up …
Have A Spooktacular Halloween!
~ Marina
More Halloween ideas:
Crocheted Ball and Chain
Leave a Reply