A friend of mine was given a huge collection of vintage buttons. Well, collection is the wrong word. She got a big box full of buttons, all mixed up. We had fun going through them all, sorting them out and finding so many little treasures! Now it is a collection!
She let me have some of them and I picked out red, black, gray, and a couple of blue/green ones to make a bracelet for Anna.
It’s surprisingly easy to do! As well as fun!
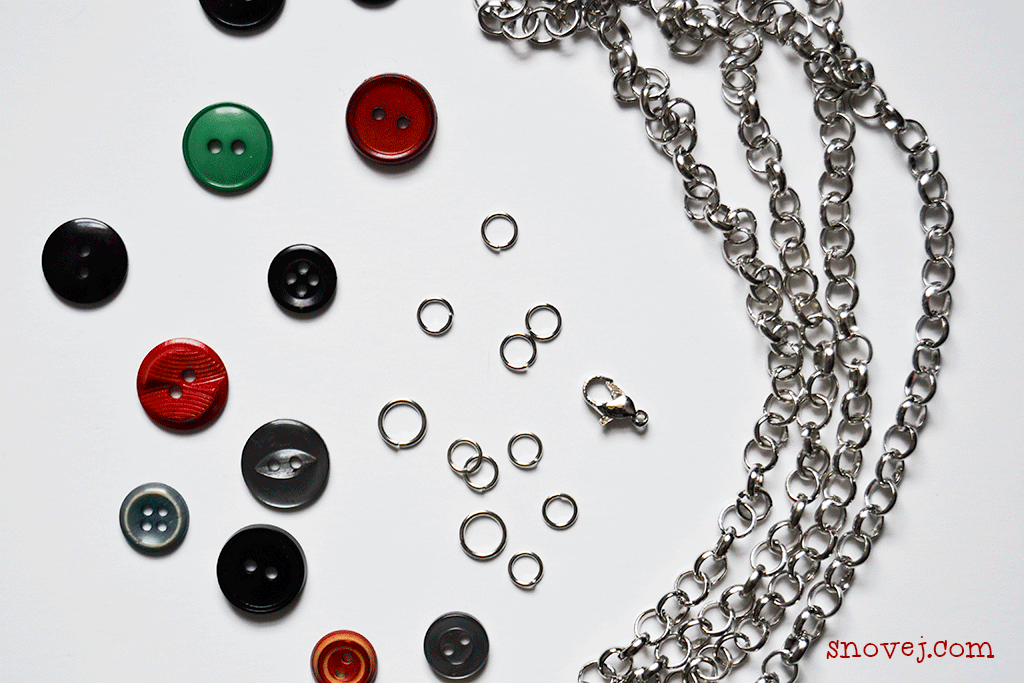
You’ll need two small pliers, a chain or two, a fastener, jump rings, and of course buttons!
Measure the chain to fit around the wrist. A common length is 7 to 7 1/2 inches ( 17 to 19 cm), including the fastener. If you’re not sure of how long it should be, you can add a short length of a plain chain that the clasp can be fastened to in order to vary the length.
Below is a photo of three different chains that work well with this project. I like to use the lobster claw clasp as a fastener.
Cut the chain to your desired length. Using a jump ring, add a fastener to one end of the chain.
The pliers need to be rather small to grip the small parts. Use jewelry/craft pliers. Bent-nose pliers make the work even easier.
With the bent-nose pliers hold – with the bent part – one side of the jump ring with the split on top, close to that split. With the other pliers, take a hold of the other side of the ring and gently twist it open. Twist so that one hand comes toward you and the other goes away from you.
Still holding the ring with one of the pliers, place a button and then a link of the chain in the ring. Then take the second pliers and, reversing the twisting motion you did earlier, close the ring. Make sure the ends meet up. I found a good explanation and video here.
It can be difficult to find jump rings to fit the bigger buttons. I used individual links from a simple big chain.
Take hold of the last link in the chain, twist it open and remove it from the chain. Close it. With the length of both pliers hold the link on both sides, then gently press and twist to make it flat. Then twist it open and add the button and chain before closing it again.
I started by connecting the big black and red buttons first, alternating the colors. Then I added the smaller ones. I used about 30 buttons!
To the last link – opposite the clasp – I added another chain. It’s about 1 to 1 1/2 inches long. The lobster claw clasp fits nicely into the links of it and this way the length of the bracelet can be varied. At the end of the extra chain I added one button to give it a nice finish.
Besides buttons, you can add little charms and beads and so many other things to make the bracelet unique to its wearer!
Have fun!
~ Marina
P.S. While you’re at it, why not make a whole set with a matching necklace, and earrings too!
Here’s a fun and short video tutorial for a button necklace. By Whitney Sews. Click on the photo!
I really like this cute and simple button necklace. Made and sold by Simple SoulStudio on Etsy.
These button earrings are so easy to make, and so cute! Tutorial by Bacon Time with the Hungry Hypo. Click the photo!


Leave a Reply