
I’m working on a rustic display for our fair booth. A while back I posted a picture of fruit crates on our Facebook page that I made to look old and weathered. The response to this photo was huge and I got several inquires about how to do this.
It’s easy. You might even have everything that’s needed in your kitchen!
How to make new wood look old
The process is very simple. The wood is first painted with tea, then painted with a vinegar/iron mixture.

This tutorial by Frugal Farmhouse Designs is good and easy to understand. But there are a lot of questions in the comments and I had a lot too.
The process seems like magic. A weird chemical reaction. I felt very much unsure about being able to get it right. To begin with, the white vinegar in my country is 10%. The one in the US is 5%. Should I dilute it? What actually is Fine Steel Wool? How much is needed? And so forth …
This is how I did it:
Step 1: Make the vinegar/iron mixture
I started by finding a small glass jar with a metal lid.
The only steel wool I had was the pot scrubbers with soap. I rinsed the soap off and ripped up the wool pads in the process. Then I filled the jar with the steel wool and topped it off with the 10% white vinegar. For good measure I added two old rusty nails!
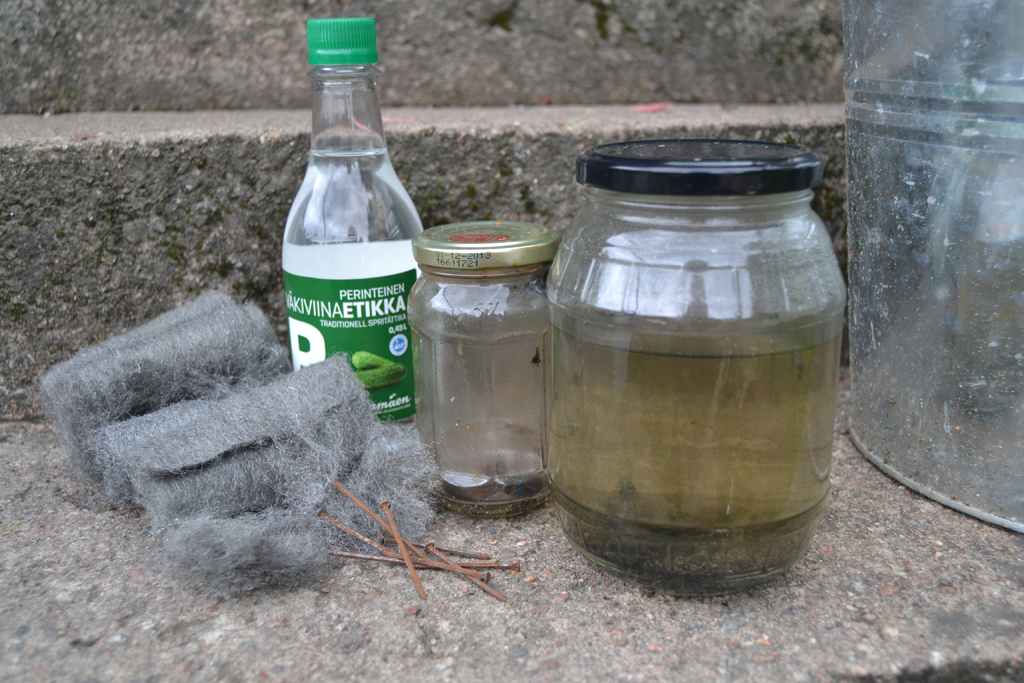
After a while something was going on inside the jar. Small bubbles appeared and the steel wool seemed to move upwards … Spooky!
The mixture is supposed to sit 24 hours for the vinegar to dissolve the steel wool. But the following day I didn’t have time to use it.
The second day we heard a small popping sound in the kitchen. Finally we realized it came from the jar! Very carefully I carried it outside, afraid it would burst, and opened the lid. The sound stopped and all was well.
After my first try at this, I continued a week later. I’d made a new batch in the small jar and all that was left of the steel wool – this time fine grade steel wool from the hardware store – was a rusty gunk on top of the vinegar and a small piece of the second nail lay lonely on the bottom. I assumed the mixture was now extra “iron-y”, so I decided to pour it into a bigger jar and dilute it with the same amount of new vinegar. I used it right away and it worked fine!
Read the Update at the end of this post!
Step 2: Brew strong black tea.
I used two tea bags and about two mugfuls of boiling water. I let it cool down and never even removed the bags.
Step 3: Find a good place for treating the wood.
First I treated just a small piece in the kitchen sink, but I soon discovered that both the tea and the vinegar mix splatter all over the place and the dark dots are a pain to remove …

Step 4: With a paintbrush apply tea all over your piece.
Work from one end to the other, getting tea into every little crevice and hole.

The tea doesn’t darken the wood much, only makes it wet. When it’s dry you can’t tell whether it’s been treated or not.
Step 5: Let the wood dry completely.
Step 6: Apply the vinegar/iron mixture.
My mixture was now about 48 hours old and much of the steel wool had disappeared. The color of the mixture was slightly grayish clear with tiny specks of the steel wool. The remaining steel wool had turned into a gray gunk floating on top. I removed that.
The wood will react right-away and start to turn gray. The color gets darker as the wood dries.
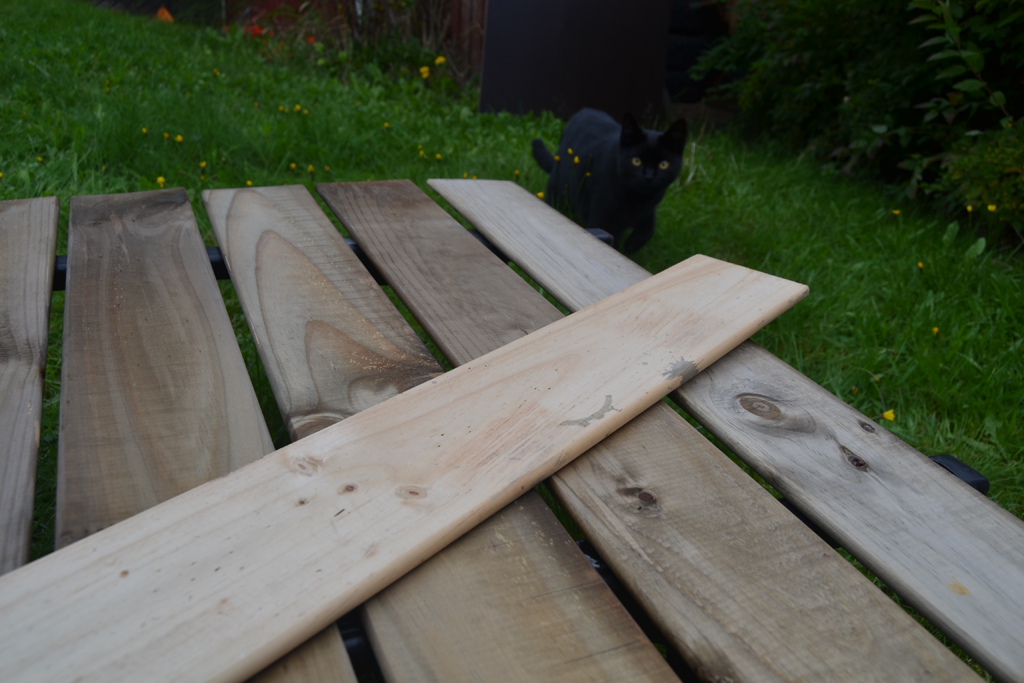
The wood is treated and starting to turn dark. The piece on top is not treated, but you see some dark splatter on it.

This is how dark it got once it dried.
The treatment is only on the surface. If you want to cut into the wood or sand it, you have to treat it again. This treatment is also good to use when you have to cut naturally weathered wood and want to give the fresh cuts a weathered look too.

Oooops! I forgot to turn this board. The vinegar mixture seeped through the crack.

The branch knots stayed red.

The step-shelf was glued. The treatment does not work as well on the areas with dried glue.
More Fun Experiments
Just for fun I tried the treatment on paper, linen and jute rope.
Here’s a photo of the linen (57% flax linen / 43% cotton):
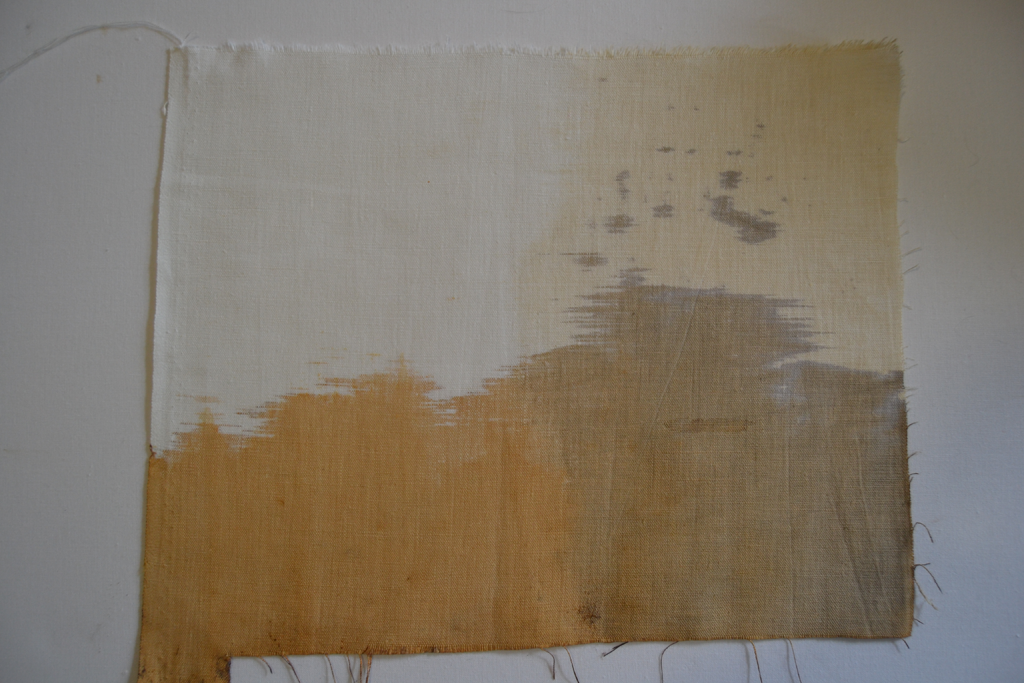
‘Left top corner: Untreated
Right top corner: Tea
Left bottom corner: Vinegar/iron on untreated linen turns a rusty red color.
Right bottom corner: Vinegar/iron on tea treated linen turns gray.
I only dipped the linen in the liquids, holding it down a few seconds. I did the same with a piece of jute rope. The knotted end is untreated, the middle dipped in vinegar/iron mixture and the end part in tea, dried, and then in vinegar/iron.
The jute also turns a rusty red from the vinegar/iron and the double treatment turns it gray.

This procedure really tickled my creativity! I will explore it further. Will the vinegar mix cause a darker stain when it’s been brewing longer? Will the color get darker if you apply it twice? Will different woods react differently? The step-shelf is made of pine, the boards are of unknown timber taken from melon pallets from southern Europe, but the color is the same. Is the rusty color on the fibers caused by the rusty nails?
I love natural crafts! Let me know what you think, or if you’ve experimented, too.

Update September 13th
Today I used the leftover of a week old vinegar/iron mixture. The wood turned dark, chocolate brown! The wood had first been treated with tea and let dry. Seems the color gets darker over time.
~ Marina
So, before treating your wood, do a small sample first! Make enough vinegar/iron mixture to treat your whole piece at once!
I have now started an experiment with two sets of two different mixtures. One with 10%vinegar and one with 5% vinegar. One set I’m going to leave as it is, the other will be strained to remove the steel wool leftovers.
I’ll let them brew for 24h and then paint a sample every day to see how the color changes. Stay tuned … =)
Update June 22, 2013
Here’s part two:
Leave a Reply