For the 50 Years of Flower Power project by Prudence Mapstone I crocheted a peace sign. It’s made around a 7 inch metal ring. I got requests for the pattern, so here it is …
The Peace Sign is actually older than the phrase Flower Power. It was designed by an English artist for a march in London against nuclear power in 1958. The center lines are based on two distress signals in flag semaphore (a system to signal information with flags) and this led to some controversy of its use in the early years. As the use of the sign spread over the years, it became associated with peace, not distress about nuclear power or any other presumed associations.
You need:
Metal ring of about 7 inches (18 cm) wide
Yarn, light worsted (DK) weight. I used black Seven Brothers (Seitsemän Veljestä), which is a heavy sock yarn from the Finnish yarn company Novita.
Hook US G (4 mm)

Step 1
Single crochet (SC) (Double crochet in UK terms) around the ring. Make them really close to each other. I fit 168 stitches on mine. Slip stitch (SL ST) in first sc making sure the row of stitches isn’t twisted.

Step 2
Chain (CH) 1, SC in every other stitch. SL ST in first sc. (84 sts) Turn the stitches inward towards the center of the ring.

Step 3
CH 1, SC in every other st. SL ST in first sc. (42 sts)

Step 4 The center line
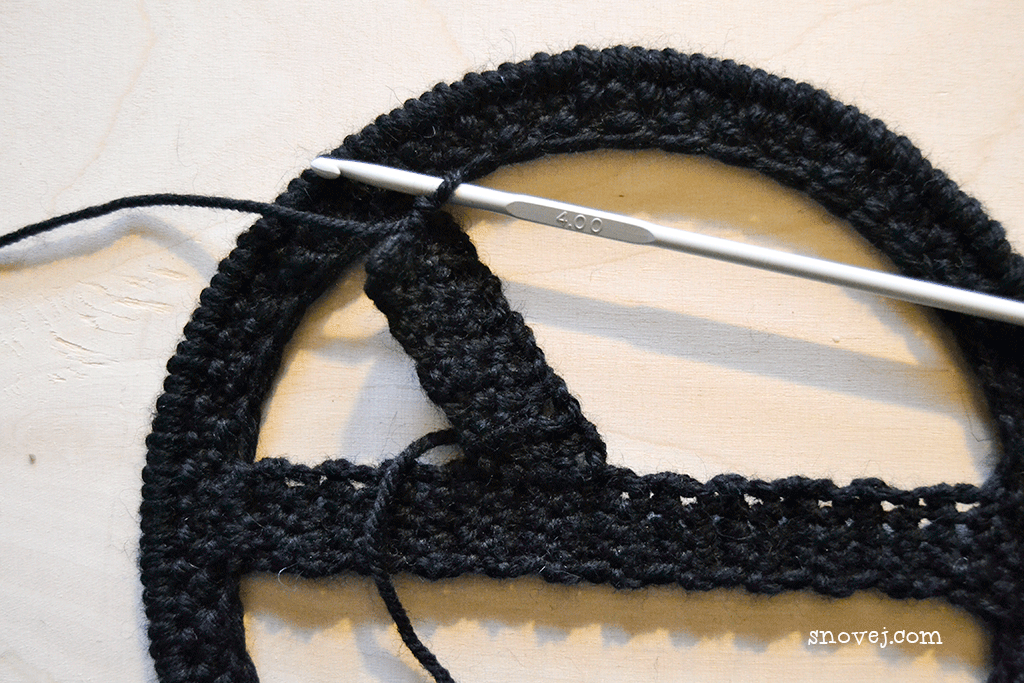
CH 1, SC in next 4 sts. Turn. Repeat until you reach the opposite side while pulling the work somewhat tight. Cut the yarn, leaving a tail for sewing. Pull through the loop. You can count the stitches or just estimate the placement of the end of the center line. Sew the piece in place. See photo.

Don’t crochet all the way down to avoid slack. You need to pull the center line taut!

Step 5 The sloping side bar
Attach yarn at about a 1/3 of the length of the center line on the wrong side of the work. See photo!
SC in next 2 sts, turn
*CH 1, SC in same, SC in next 3 sts, turn. CH 1, 2 SC in same st, SC in next st, skip one st, SC in next st, turn.*

Repeat * to * until you reach the circle. I made * to * 4 times. Then CH1, SC in same, SC in next st, SL ST in next st. Cut yarn, use the tail to sew the piece in place. You might want to wait with the sewing until you’ve made the other side bar in order to get them pulled evenly without distorting the center line.

Step 6 The other side bar
Attach yarn on the opposite side of the center “line”, on the right side of the work. Repeat Step 5.
Weave in the ends.

There you have it! Peace!
~ Marina

Leave a Reply